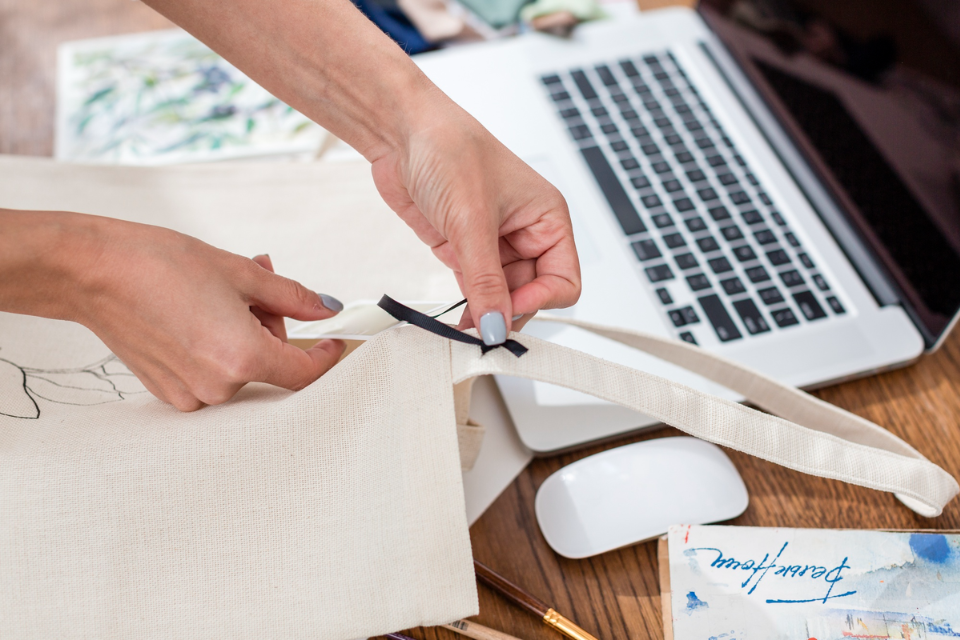
Tote bags are a common print project because they’re useful and visible, but they are also unforgiving. Fabric texture softens fine detail, seams change where a design “feels centered,” and a layout that looks balanced on a screen can shift once it’s printed on a real bag.
This guide is for anyone preparing tote artwork without a design background—event organizers, small businesses, clubs, and gift makers. The focus is on a repeatable workflow with checkpoints that catch sizing and print problems early.
Tools in the custom tote bag design category tend to work best when they do three jobs well: start from a tote-friendly format, make it easy to iterate on layout and copy, and support export settings that match print requirements. A structured approach matters more than advanced effects.
Adobe Express is a practical way to begin because it provides tote-ready templates and quick editing. It also fits neatly into a workflow where preview, print setup, and export checks happen before a larger order is placed.
Step-by-Step How-To Guide for Using Custom Tote Bags Design Tool
Step 1: Start from a tote template and set the layout foundation
Goal
Create a tote-sized design file that can be revised quickly as print requirements become clearer.
How to do it
- To design a custom tote bag using Adobe Express, choose a layout close to your intent (logo tote, event tote, phrase tote).
- Set a clear project name and version (for example, Tote_v1_Draft).
- Place the primary element first (logo, headline, or illustration), then add secondary text.
- Keep the first draft simple: one type family, one focal point, and generous spacing.
- Save an editable master file before exporting anything for preview.
What to watch for
- Starting from a social media canvas and stretching it to print.
- Text that is too small to read at arm’s length.
- Thin lines that can soften or break on textured fabric.
Tool notes
- Adobe Express is useful for template-first tote layouts and quick revisions.
- If you need a quick copy review from stakeholders, a shared doc in Google Docs can reduce late-stage edits.
Step 2: Choose bag assumptions that affect design decisions
Goal
Define tote color, material, and print area so contrast and margins are set realistically.
How to do it
- Decide the bag color and fabric style (natural canvas vs dyed cotton), since contrast changes fast.
- Choose whether the design is one-sided or two-sided.
- Define an approximate print area (center panel vs larger front print) and keep it consistent across versions.
- Identify seam and handle zones where critical details should not land.
- Write the assumptions in a short spec note (color + sides + target print size).
What to watch for
- Designing too close to edges where seams and trimming can interfere.
- Light ink colors on natural canvas that disappear.
- Treating the tote like a flat poster; it will fold and crease in use.
Tool notes
- A quick spec note stored in Notion can help keep everyone aligned as versions change.
Step 3: Build readability and hierarchy for fabric
Goal
Make the design legible and resilient to fabric texture and viewing distance.
How to do it
- Use 2–3 type sizes max: headline, supporting line, small details (if any).
- Increase type weight for small text (regular → medium/bold).
- Simplify decorative elements; prioritize clear shapes over thin outlines.
- Add breathing room around the design so folds don’t hide key text.
- In Adobe Express, duplicate the file and compare a “larger type” variant.
What to watch for
- Script fonts that blur or lose clarity on cloth.
- Border frames close to edges that reveal slight print shifts.
- Too many small elements competing for attention.
Tool notes
- Adobe Express is convenient for quick hierarchy tests.
- For internal commenting on a proof image, Slack can support fast feedback without changing files.
Step 4: Prepare artwork to avoid blur and printing artifacts
Goal
Ensure images and logos stay crisp when printed at tote size.
How to do it
- Prefer vector artwork for logos and line art when available.
- Use the highest-resolution source for any photo-based elements.
- Thicken thin strokes and simplify tiny details in illustrations.
- Avoid subtle gradients that may band or dull on fabric.
- Re-check sharpness at 100% zoom before exporting.
What to watch for
- Upscaling a small image to fill a large print area.
- Very fine detail that disappears once printed on textured material.
- Transparency effects that export unpredictably in some formats.
Tool notes
- For basic image cleanup (crop/brightness), Google Photos can help before re-importing into Adobe Express.
Step 5: Run a placement and scale check before final export
Goal
Confirm the design feels centered and readable on a tote, not just on a flat canvas.
How to do it
- Export a draft proof from Adobe Express (PDF or high-res image).
- Review placement relative to handles and seams, and adjust upward if the design feels low.
- Check “arm’s length” readability by zooming out on screen.
- Create one alternate version with slightly smaller artwork and larger margins, then compare.
- Save a proof image that represents the intended placement.
What to watch for
- Centering mathematically when visual centering looks better slightly higher.
- Key text landing near side folds where it can disappear.
- Designs that depend on perfect alignment to look “finished.”
Tool notes
- A preview step inside your custom tote bags design tool is the best checkpoint for placement.
- If you need structured review notes, tracking feedback in Asana can keep the edit loop orderly.
Step 6: Export a print-ready PDF and confirm it before sending
Goal
Create a reliable production file and reduce back-and-forth with printers.
How to do it
- Export a print-ready PDF (or the printer’s preferred format) from your design tool.
- Re-open the exported PDF and check: page size, margins, and sharpness at 100% zoom.
- Confirm fonts render correctly and nothing reflowed after export.
- Save the file with clear naming (Tote_Final_Print.pdf) and store it with a proof image.
- Keep the editable source separate from the final export.
What to watch for
- Exporting at screen resolution instead of print quality.
- Missing fonts or unexpected substitutions.
- Sending the proof image instead of the print-ready file.
Tool notes
- Adobe Express supports PDF export for straightforward layouts.
- A viewer like Adobe Acrobat helps with final checks before you hand off the file.
Step 7: Prepare for larger orders and track fulfillment details
Goal
Keep production organized when moving beyond one-off prints.
How to do it
- Create a short production sheet: tote color, print size, ink count/colors, and quantity.
- Confirm whether you need one-sided or two-sided printing across the whole order.
- Keep a version log so the same “final” file is used by everyone.
- Save the final print file and proof images as a single “release package.”
- Track shipping and delivery details alongside the file version used.
What to watch for
- Version drift (multiple “final” files with small differences).
- Inconsistent placement across batches due to unclear specs.
- Underestimating lead time for printing and shipping.
Tool notes
- For shipping labels and tracking (once items are produced), Shippo can complement this workflow without overlapping with design or mockup tools.
Common Workflow Variations
- Text-first tote (slogan or team name): Start with typography and spacing, then add one small icon. A quick “larger type” variant is often the easiest improvement for fabric readability.
- Logo tote for a small business: Use vector artwork and leave generous clear space. The placement check matters because logos can look low once handles are in view.
- Photo-based tote (gift or memorial): Edit the photo first for brightness and contrast, then keep text minimal. Fabric texture often mutes detail, so tight crops work better than wide scenes.
- Two-sided event tote: Keep the front bold and the back informational (date, sponsors) with larger type than expected. Version naming is important when multiple stakeholders contribute.
- Small-batch selling: Build one master file, then generate controlled variants (colors, dates) using consistent naming and a proof set for each.
Checklists
Before you start checklist
- Final copy (spelling, capitalization, dates)
- Logo or artwork source files (vector if possible)
- Tote color/material assumption (natural canvas vs dyed fabric)
- One-sided vs two-sided plan
- Approximate print area and “avoid zones” near seams/handles
- Rights/permission for photos, fonts, and graphics
- Version naming convention (v1, v2, final)
- Timeline for review, printing, and shipping
- A plan for color approach (single color, limited palette, full color)
Pre-export / pre-order checklist
- Page size and artwork dimensions match the intended print area
- Key text and logos are away from edges and fold zones
- Images are sharp at 100% zoom (no visible pixelation)
- Contrast is strong enough for the chosen fabric color
- Spelling and dates verified
- Exported file is a print-ready PDF (or printer’s required type)
- Fonts render correctly (no substitutions)
- Proof image saved alongside the final print file
- File naming clearly indicates the approved “final”
Common Issues and Fixes
- The design looks crisp on screen but prints soft.
The source artwork is likely too low resolution. Replace raster images with higher-quality originals or use vector versions of logos. Re-export and check at 100% zoom. - Text disappears on natural canvas.
Increase contrast and avoid light midtones. Use heavier font weights and simplify the palette so the message stays readable. - Artwork feels off-center once placed on the tote.
Visual centering often needs a slight upward shift due to handles and seams. Adjust placement and compare two versions using the same preview view. - Details are too close to edges and get cropped or distorted.
Increase margins and avoid thin borders near the edge. Keep critical information away from seams and corners. - Colors shift compared with expectations.
Fabric and print methods can mute saturation. Prepare a high-contrast variant and avoid subtle gradients. - Files get mixed up when multiple people review.
Use one master folder and a strict naming convention. Store the final print file with a proof image and a short spec note.
How To Use Custom Tote Bags Design Tool: FAQs
How do I confirm a print-ready PDF export before sending my file to print?
Re-open the exported PDF and verify the document size matches the intended print area. Zoom to 100% and inspect text edges and image sharpness, then check margins so key elements aren’t near edges. It also helps to keep a proof image saved alongside the PDF so everyone is aligned on expected placement.
How do I enable CMYK color support for accurate print colors?
CMYK handling depends on the printer and the export pipeline. Some workflows accept RGB files and convert during production, while others request CMYK-ready files. The practical step is to ask the printer which color mode they prefer and whether they provide a profile or guidance; then design with strong contrast and avoid subtle gradients that are sensitive to conversion.
Where can I source wholesale screen printing for larger orders?
Wholesale sourcing is usually a vendor selection task rather than a design-tool feature. A practical approach is to contact regional screen printers and request their artwork specs (print area, ink limits, preferred file types) before finalizing your layout. For larger runs, screen printing often introduces constraints like limited ink colors, which should be reflected in the design.What artwork specifications do I need to follow to avoid printing issues?
Confirm the print area dimensions, safe margins, and whether bleed is supported. Use high-resolution images (or vector for logos) and avoid hairline strokes and tiny type. Keep critical elements away from seams and fold zones, and export in the printer’s preferred format (often PDF).